When my kids were 8-9 years old, I taught them some basic sewing skills. They each made a patch work pillow, and a felt needle holder. I have to say I haven’t thought about exactly what is the best way to teach a child to sew or what is the best age to start them? My oldest grand daughter, Anne, has watched me constructing many different things and never hesitates to come running when there is a tear or unraveling seam on any toy or garment. Once when I was making a princess costume for her she begged to help me so convincingly that I let her. She was about 3; helping only lasted a few minutes until she pricked her finger with a pin and the flood gate of tears opened. I felt so bad!


But teaching each of my grandkids to sew is a goal of mine and as I become busier it has become easier to put it off. Today I had a small window of time I could spend with just Anne, who is now 5, and I decided to start on a sewing lesson. The plans I had for the lesson went out the window before they were started. She let me know about a friend’s birthday party she wanted to attend but didn't yet have a gift to take, and she wanted to make her something just like I always make gifts.
Well, now we needed an idea for a sewn gift simple enough for a 5 yr old that could be made in a couple of hours and be nice enough that she would not be embarrassed by it if someone remarked on the ‘handmade quality’ of said item. Talk about putting gramma on the spot, right?? Well one thing for sure; being old enough to have earned the title of Grand Mother, and having learned a few skills along the way, I did quickly come up with an idea.
Now you are going to say “oh I've seen felt flower hair clips before righthere on this blog!” but, you have not seen the process accomplished by a first time seamstress. What I figured out for her first lesson worked wonderfully, and she was very happy with her end product. She was not frustrated by her first sewing attempt, it didn't take so long that she become bored by it, and she can’t wait to do it again! That’s more than I had hoped for. Let me show you how it all worked out.
What she/we made was a felt flower hair clip and using the template I already had we traced the flower onto felt. She cut them out but they were a little wonky so I cleaned them up. There are 3 layers of petals with each layer smaller than the last, and 2 leaves.
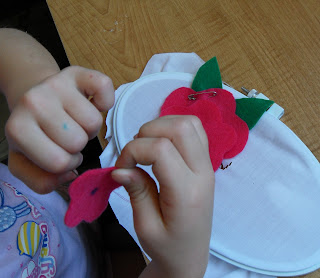
Next I placed a dot with a marker in the middle of each petal front and back. I threaded a large needle for her and put a big knot in the end using a double thread. I soon realized that she was having a hard time remembering which side the needle should go into next, and she was having a hard time holding the small pieces.
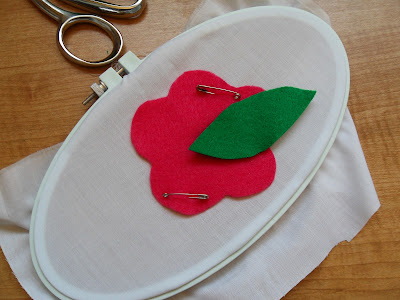
I quickly took the flower apart and got out an embroidery hoop, put a thin light weight fabric into it and put a dot almost in the middle of it using the marker then pinned the first petal layer to the fabric. Now she could hold onto the hoop and since the thread was not long enough to easily cross over to the wrong side she could remember to re enter the fabric on the correct side.
First put the needle through the fabric in the underside of the hoop and into the center of the largest petal at the marker dot; sew through the end of one leaf and dot pulling tight. (you will notice in the pic I did not put a marker dot in the leaf; but you could)
Then sew through the end of the other leaf adding it to the layers. Now go back through both leaves, the petal and through the fabric to the back side of the hoop. Tie your thread.
She was not able to tie a knot so I did it for her securing the first petal and leaves; but do not cut the thread yet. Remove the saftey pins and cut the flower off the fabric leaving the fabric in the hoop. You can trim excess fabric away later. I did this part for her.
Make another dot on the fabric close to the center and turn the flower petal so that the leaves are now down against the fabric and the petal is up. Pin flower to fabric again matching the dots.
Push the needle up through the fabric from the back of the hoop at the dot going up through the leaves and petal; then add the medium petal and the smallest petal.
Go in and out of the petals/leaves a couple of times keeping thread tight to secure it.
We added a button to finish the flower off the same way; up through one hole and down through the other all the way to the underside of the hoop.
Tie off the thread on the back of the fabric in the hoop and cut it away from the fabric. Trim away excess fabric if necessary.
Now add a clip or sew to a headband. We used a clip, and this proved to be too difficult for Anne so I finished it off. I’m sure she could have sewn it to a stretchy headband if we had had one, and I probably would have used the hoop again to hold it for her.
Most of the project was accomplished by her and she did a good job with it.
Here is a picture of the birthday girl wearing Anne's gift.
Most of the project was accomplished by her and she did a good job with it.
I think I will start all of my grand kids sewing this way. Now I need to find a good second lesson, and third.........
Copyright © 2013 by Hill House Homestead ALL RIGHTS RESERVED


No comments:
Post a Comment
Gosh I love to read your comments! Thanks for leaving one :)